As is known to all, Fatshark always provides high-quality FPV equipment. For instance, the new version Fatshark Dominator V2 FPV Goggles Glasses has warmly promoted since it was launched on the market. If you’re looking for truly fabulous goggles, you can keep reading to get more information about the video glasses.
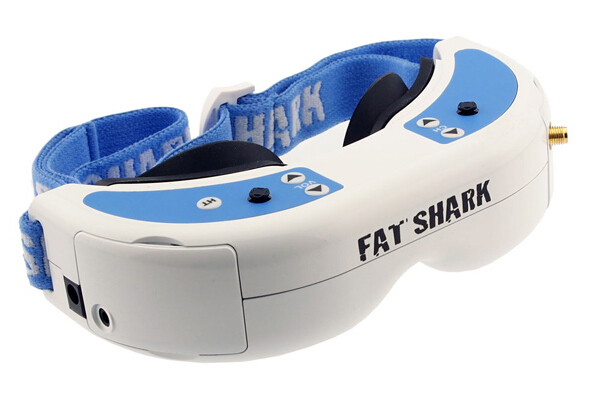 This time I won’t start from first person view which has been talked many times before. Leading revolutionary 6P plastics optical element with 8mm entrance pupil diameter in, Fatshark Dominator V2 will always provides the widest visual display. Besides, the blue frame is closely associated with plastics optical element, forming into a perfect square which helps focus on image floating into your eyes.
 What’s more, polarization look back light source and greater magnification makes Fatshark Dominator V2 more bright than his predecessor. Featuring VGA resolution, modular design, HDMI input and integrated DVR, this is really a multi-functional FPV goggles. Moreover, it’s perfectly compatible with the existing radio frequency module, including the upcoming G3 1 and 2G4 NexwaveRF frequency and trinity head tracker.
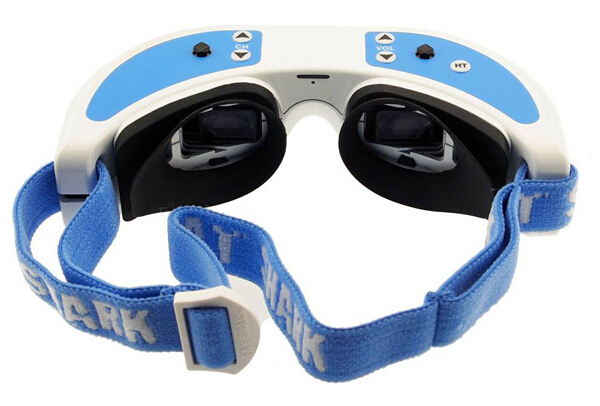
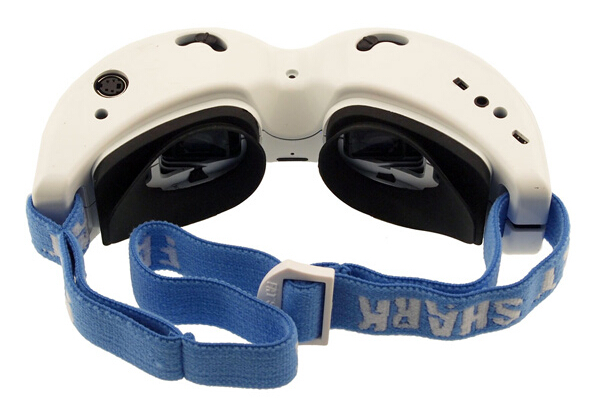 As for adjustment, you can see there are several buttons and interfaces on Fatshark Dominator V2. For example, there is a important rocker on the left upper side of board, via whom you can reach better video effect. you may press left and right increase/decrease display contrasts, while the brightness adjustment should be done by pressing forward and back. Near the button, there are up and down buttons for channel select, and it provides 8 channel available.
On the right side, the up and down buttons are easy for you to adjust the volume level. And Fatshark Dominator V2 can match any standard headphones. Additionally, there is special rocker for start/stop/playback to control the video display. Besides, you have to pay attention to DVR control interface, connecting AV cable to AV out port on right sides of the headset and connecting recording device to cables and set up as per manufacturer directions.